HOW TO TRANSFER A STUDENT
HOW TO DO A TRANSFER
Please Note: As it relates to Transfer in and Transfer outs, it is required that both schools doing the Transfer communicate to have this process done with ease.
SENDING INSTITUTION
STEP 1: Navigate to the students’ profile by clicking Students then clicking the student’s name you wish to Transfer in the list.
STEP 2: Click the "Transfer Icon at the top in blue" at the top of the students’ profile to begin the transfer process.
STEP 3: The current Education Grade to which the student is being transferred will be displayed by default but can be changed if necessary. The Initiator for the Transfer should then select the school to which the student will be transferred, the reason for transfer and make any additional comments. Click Save to finalize the transfer.
Note: The Requested Date must at all times be earlier than the Start Date, the Start Date will be entered by the Receiving Institution.
Example: If Requested Date is August 23,2021, Start Date must be August 24,2021 or after.
STEP 4: Remove Student Transfer Status from "Open". Return to Student record and Select "Transfer Icon".
STEP 5: Select the "Check sign at the Top in Blue" to Approve 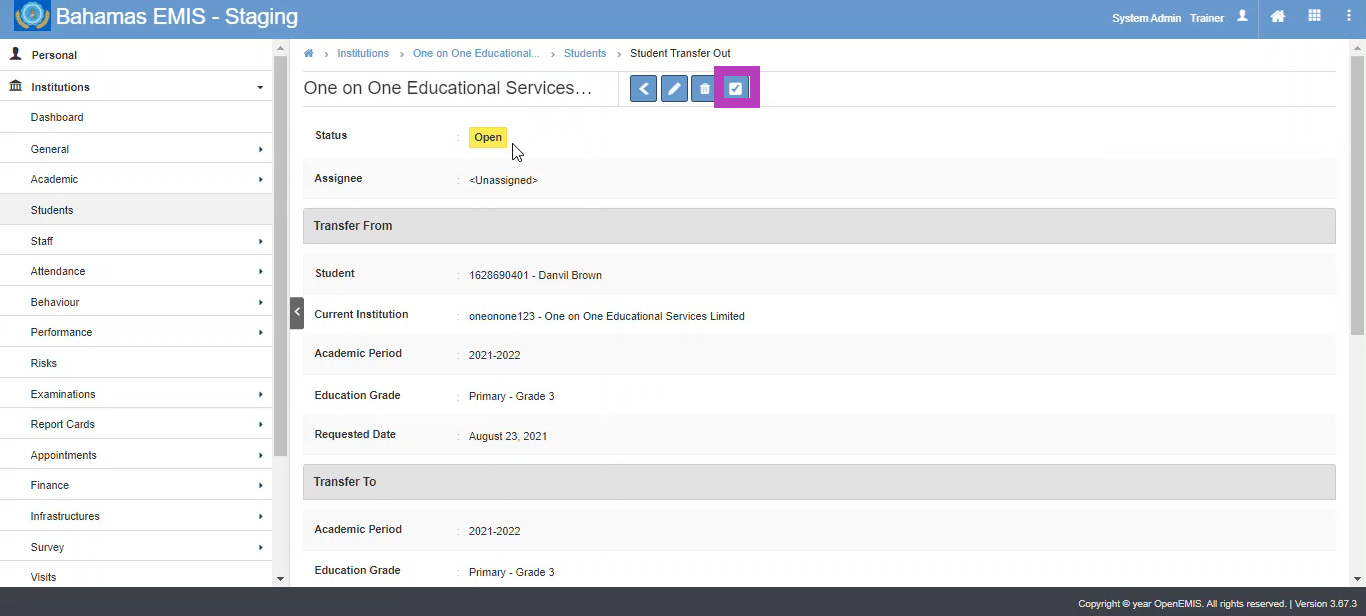
STEP 6: Select Assignee and leave an optional comment and Click "Save".
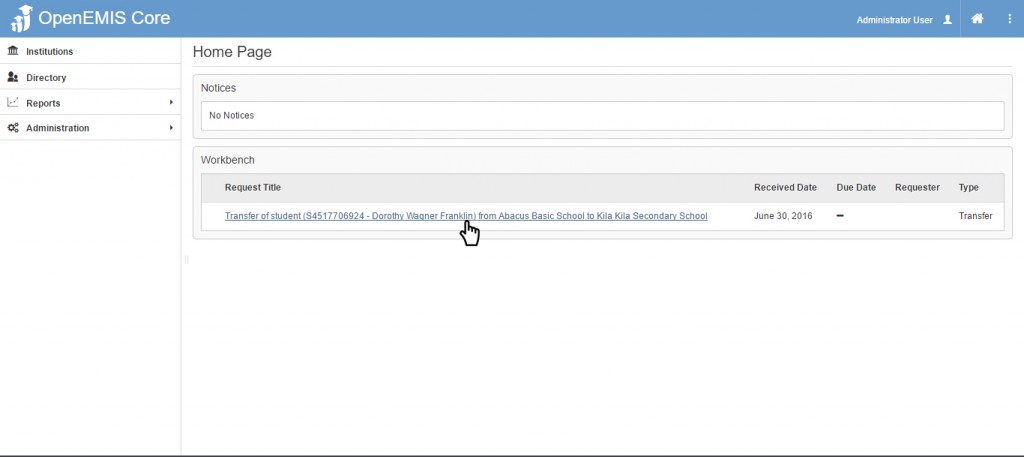
N.B: When the Assignee selected logs in, he/she will see a new notification on his/her workbench to review the request, he should click on the title of the request. The Assignee should also get an email notification stating that an assignment is awaiting his/her approval.
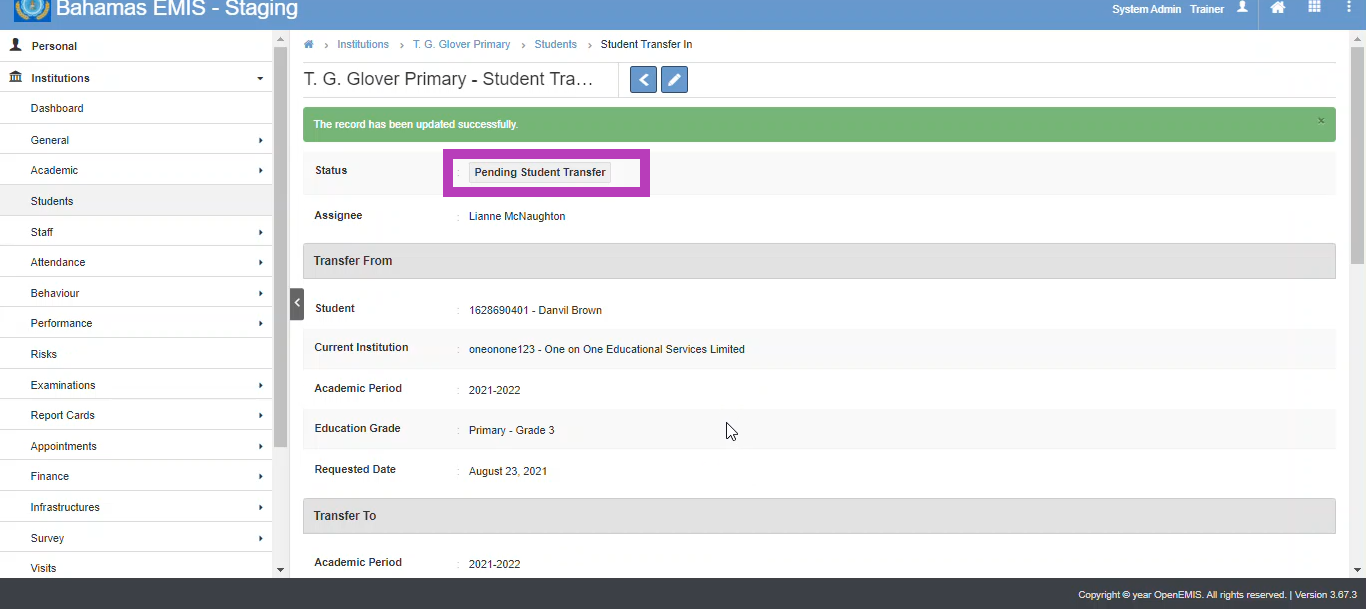
STEP 7: After Seeing "Pending Approval", the Assignee should select the "Check sign at the Top in Blue" to Approve.
Auto assign will be in place (Assignee to approve from Receiving Institution) leave an optional Comment and Click Save.
The Transfer is Pending Approval from the Receiving Institution.
STEP 8: After receiving Institution approves, then go to Institution>Students> click the drop down Arrow which has "enrolled" as default, then select "Pending Transfer Out" or select the Student.
STEP 9: Select "Transfer Icon" then select the "Check sign at the Top in Blue"
Final Step: Select Assignee once More and leave an optional comment and Click "Save"
TRANSFER COMPLETED
RECEIVING INSTITUTION
STEP 1: When the Principal or Administrator from the school receiving the transfer logs in, he/she will see a new notification on his/her workbench. This is the transfer request. To review the request, he/she should click on the title of the request.
STEP 2: Authorized Users to Approve the Transfer can also go to Institution > Students > click the drop down Arrow which has "enrolled" as default, then select "Pending Transfer In"
STEP 3: Assignee should now Select the Student Coming into the Institution:
STEP 4: Edit the Student Information and Insert the Class the Student should be assigned to and also the Start Date for the Student. Click Save and then Click the Approval Icon.
Note: The Start Date must at all times be later than the Requested Date, the Requested Date will be entered by the Sending Institution.
Example: If Requested Date is August 23,2021, Start Date must be August 24,2021 or after.
Note: Once the Assignee at the Receiving Institution selects “Approve” the request will be sent back to the Sending Institution to release the Student.
The student’s status will then change to “Transferred” in the school that requested the transfer.
Related Articles
How Do I Sign Into My Student Account?
To sign in to your student account: Have your Username and Password ready. Your username/password will be provided by your School Administrator. Go to the sign in page https://bahamas.1on1lms.com/StudentRegistration/action/login Enter your username ...Add Guardian via Institution Student
This feature enables users to add Guardian via Institution Student. 1) Click on Institutions on the left navigation menu 2) Select an Institution to which the student of the Guardian belongs to. 3) Click on Students on the left navigation menu. 4) ...Release Notes 4.5.2 - June 9, 2022
Bahamas NDEP (National Digital Education Platform) Release Notes Date: June 9, 2022 Introduction This release document communicates the major new features, upgrades or enhancements for this release of Bahamas National Digital Education Platform ...Verifying Students
Verifying student data involves completing the student list with the respective student information and making sure it is correct. 1. Go to Institutions 2. Select Students 3. Locate the student name by scrolling through the list or searching for a ...The Class Overview/Classmate Page
The Class Overview/Classmates Page The class overview contains an outline of the teachers and students assigned to the class. Class Teachers This section shows the name of the teacher(s) assigned to the class. To message a teacher: Click the "Send ...